

Whenever Apple announces a new iPhone, sales usually exceed analysts’ expectations. Most of the people buying these smartphones are doing it for the first time or are switching from an Android phone. So, if you have grown tired of your Android device and want to switch to an iPhone, we are here to help you. With that said, the entire process can be tough because you are not just changing the devices. You are adjusting to a new operating system.
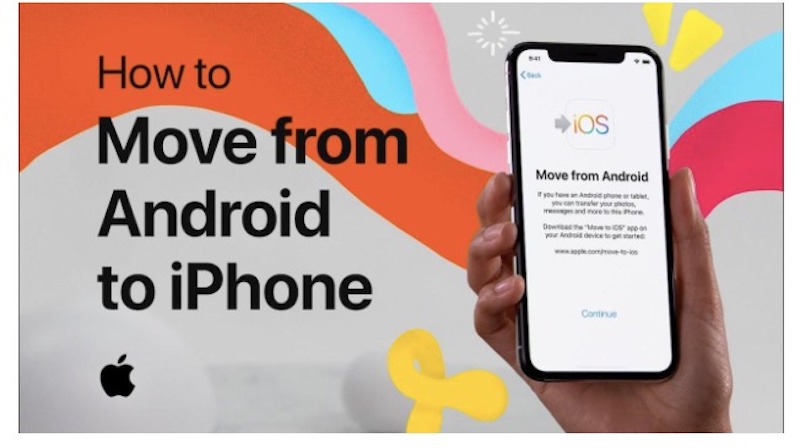
You have probably accumulated several apps and other files like photos, contacts, videos, and calendars, and worried about losing them. Thankfully, you can transfer most of your Android content to your iPhone, of course, with some few exceptions. Foreseeing the challenge of making the switch, Apple introduced an Android app called Move to iOS to help streamline the process. This app will help Android users to transfer important files to their iOS devices within a few minutes. Here is how the whole process goes:
Step 1: Backup Your Data
Before initiating the switch, you must sync the content of your Android device to your computer. Among the content you can sync to your computer include calendars, music, photos, address books, and videos. To say the least, sync as much information from your Android device to your computer. This process might not be necessary if you are using web-based systems. Refer to this guide to take a complete backup of your Android device.
You can achieve the same goal by using built-in backup mechanisms within your Android phone. To do so:
1. Go to Settings, and then navigate to Backup & Reset (You may also find this option under Cloud and Accounts, depending on your version of Android).
2. After that, check to ensure you have the right email address listed under the Backup account section.
3. Be sure also that the Back up my data option is turned On.
Besides creating a backup of your files, you should also clean your Android device to ensure that you don’t transfer trash into your new device. It will also improve the performance of your phone, simplifying the transfer process. One of the easiest ways of deleting junk on your phone is by using cleaners for Android phones. The good thing is that you may not need to spend money to get yourself the best Android cleaner and booster.
Step 2: Start the Setup Process
Before you start the transfer process, there are four main steps that you have to cover:
# Set up your phone to use the Move to iOS app. Sometimes, you may need to move the data manually. After that, erase the device by tapping Settings > General > Reset, and then select Erase All Content and Settings. Doing this will get rid of everything on your iPhone.
# Make sure the two devices are connected to the internet. You may also need to plug both your Android and your iPhone into a power source.
# You need to check the capacity of your iPhone. The content you are transferring from your Android must fit your new device.
# Finally, you need to update the Chrome browser on your Android device. The reason why you should update it is that it will make it possible to transfer Chrome bookmarks from your Android phone to your iPhone.
Step 3: Download the Move to iOS App
Head to the Google Play Store, and then download the Move to iOS app. The app supports any device that runs Android 4.0 or later. So, your Android device is likely to be running the required version. But note that the app can only transfer content to devices running iOS 9 or later. The Move to iOS app will transfer information to iPhone 5 or later.
As for data, the app will transfer:
# Contacts
# Photos
# Text messages
# Calendar
# Videos
# Mails
# Web bookmarks
But keep in mind that the app will not transfer your Android apps, passwords, and music into your iPhone.
Step 4: Now, Transfer the Phone Content
1. Open your iPhone and navigate to the Apps & Data screen.
2. From here, choose the Move Data from Android option.
3. Now, open the Move to iOS app on your Android device and hit Continue. It will take you to Terms and Conditions, which you will have to accept.
4. After that, the Find Your Code screen will appear on your Android phone. To connect to your iPhone, tap Next.
5. Turn your focus to the Move from Android screen on your iPhone and tap Continue. Wait for a six- or ten-digit code to appear, and then enter it to your Android device.
6. The Transfer Data screen will pop up, which lets you choose the data you want to send to your iPhone.
7. Specifically, it will ask you if you want to transfer your text messages, Google Account info, contacts, Chrome bookmarks, and content in your camera roll. When you have chosen all that you want to transfer, tap Next.
Wait for the loading bar on your iPhone to complete. It does not matter even if the Android device signals that the process is over.
Step 5: Moving Files Manually
As with everything else, transferring your data manually is time-consuming, but sometimes it is necessary. For instance, if you are already using your iPhone, you may not want to set it up again, making manual transfer the most suitable option. Other than this, the Move to iOS app might not recognize and transfer some data. In such cases, you will have to transfer the residual content manually. To accomplish the task, you will need:
$ Your new iPhone
$ Your old Android device
$ iTunes
$ A Mac or PC
$ USB-to-Lighting cable for your iPhone
$ Your Android phone’s USB-to-USB cable
$ Account details for services or apps you wish to maintain
When you connect your Android phone to your computer, make sure it links to it in Media Transfer Mode (MTP). Basically, you are using your computer to access the content of your Android device, and then transfer the same to your iPhone, which is also connected to your computer. Once a connection has been established, you can now begin the transfer process. Data that you may need to transfer include:
# Mails, contacts, and calendars
# Music
# Photos and videos
# Documents, eBooks, and PDFs
Step 6: Get New Apps for Your iPhone
Perhaps the biggest hurdle with transferring data from Android to iOS is that apps you have on your Android device can’t work on your iPhone. But this shouldn’t concern you too much since most Android apps have iOS versions or alternatives that can accomplish the same task. For instance, popular apps like Twitter and Facebook are all available for download from the App Store.
Thankfully, the Move to iOS app will automatically install all the free versions of iOS apps that it finds on your Android phone. Most of these apps can also be downloaded from the App Store. Unfortunately, if you have paid apps on your Android device, you will likely purchase the iOS versions all over again.
Even for Android apps that have iOS versions, your app data may not be transferred to your iPhone. You will still have to create an account for your iPhone app version. You can only preserve the data if you keep most of it in the cloud. This way, you can download the data to your iPhone app.
Will I Still Be Able to Use Google Service?
Some people may not make the switch because they fear losing Google Services. The good news is that most Google Services are available as iOS apps. So, you can download them to your iPhone. Actually, anything that you saved on your Google account will be made available on your iPhone.
But now that you have moved to your new iPhone, you might find it interesting to try Apple’s equivalent services since they are designed to work seamlessly on the iOS platform. For instance, you can use Apple’s Siri voice assistant instead of Google Assistant to accomplish nearly the same goal.
Step 7: Becoming Familiar with iOS
You have finally made the move. So, what’s next? Like most operating systems, you will find out that Android and iOS share some features, but they work differently. For this reason, it may take a while to become accustomed to the new operating system, but it is pretty easy to navigate. If you are new to iOS, then trial and error might be the best way to learn the new platform.
Closing Remarks
As you can see, transferring content from your Android device to iPhone boils down to only a few simple steps. What you should be careful about is not to interrupt the process until you are sure everything has been transferred. When the transfer finishes, restore your Android phone to its factory settings and dispose of it in the best way – for instance, selling, donating, or just keep it for future use. Also, keep in mind that most of the accessories like peripherals for your Android Phone probably won’t fit your iPhone, so you may need to keep them with your Android device.


Leave a Reply